
Installing a wall fixture shower head looks as easy as pie and in many ways it certainly is, but if you’ve ever ruined a brand new piece of furniture by not following directions or failing to heed warnings before assembling (and we all have), you know all too well it’s better to be safe than sorry. Changing your wall fixture shower head may sound like a piece of cake but it’s good to know exactly what tools you’ll need so you can be prepared before getting started and how to replace your shower head without scratching or damaging the fixture.
To change your shower head you’ll need groove-joint pliers, two washcloths, an adjustable wrench, an old toothbrush or similar small scrubbing brush, the replacement shower head and some pipe thread or teflon tape.
The first step you’ll need to take when installing your new shower head is, of course, removing your old one. To remove your old shower head, you’ll need to wrap one of the washcloths around the upper portion of your shower arm that’s closest to the wall and clamp the groove-joint pliers around it to give you a good grip. With your other hand, take the other washcloth and wrap it around the lower part of the shower arm where the shower head is attached and screwed on. Take the adjustable wrench and clamp it over the washcloth you just wrapped around the attached shower head then turn counterclockwise from the shower arm to unscrew and remove the shower head. The washcloths will prevent you from unintentionally scratching or damaging your shower arm or shower head with the adjustable wrench or teeth from your groove-joint pliers while gripping unscrewing.
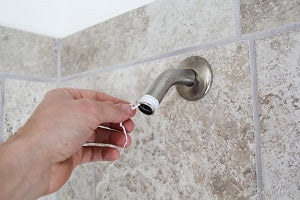
Once you’ve removed your old shower head from the shower arm, you’ll need to clean the metal threads on the end of your shower arm with an old toothbrush then wrap the shower head threads a few times clockwise with pipe thread or teflon tape.
Once you’ve wrapped the shower arm’s threads with tape, you’re ready to attach your new shower head. Align your new shower head’s threads with the tape-covered shower arm threads and begin screwing it on clockwise until it’s completely screwed on. For the last step in installing your new shower head, you’ll need to tighten the new shower head onto the shower arm to ensure it’s on secure and won’t leak when you turn the water source on. You’ll do this by placing a washcloth over the attachment to avoid scratching or damaging your new shower head and further tightening and securing the new shower head onto the shower arm with your adjustable wrench. Now your new shower head is successfully installed and you’re ready to enjoy your next shower!

