
Are you familiar with the installation of a standard wall mounted shower head but ready to try out a new versatile modern handheld shower head instead? No worries, installing a handheld shower head is just as easy! Once you know what tools you’ll need and the few easy steps you’ll need to take, you’ll be enjoying your new shower head in no time!
What You’ll Need
- Two washcloths
- Groove-joint pliers
- An old toothbrush
- An adjustable wrench
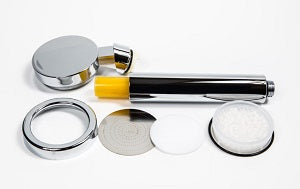
- Your handheld shower head.
Note: Your handheld shower head kit should come with a hose and mounting bracket. You’ll also need pipe thread or Teflon tape if the included mounting bracket doesn’t have a built in rubber washer.
Step 1: Remove The Old Shower Head
Before installing a handheld shower head, you’ll first need to remove your old shower head. You can do this by wrapping a washcloth around the top end of the shower arm that’s closest to the wall then clamping your pliers around the washcloth and shower arm to give you a good grip. The washcloth between the shower arm and pliers helps keep the pliers from scratching or damaging your shower arm. Next, you’ll need to wrap another washcloth around where your old shower head is attached to the shower arm. Then clamp over the washcloth and shower head attachment with your adjustable wrench and turn counterclockwise from the shower arm until your old shower head is completely unscrewed and removed.
Step 2: Prepare
Once you’ve removed and set aside your old shower head, you’ll need clean the threads of the shower arm with an old toothbrush. Then, if there isn’t a rubber washer in your mounting bracket, you’ll need to wrap some pipe thread or teflon tape around the threads of your shower arm a couple of times. If you have a rubber washer in your mounting bracket, you won’t need to apply any pipe thread or teflon tape and can skip this step. Align the mounting bracket with the end of the shower arm and begin screwing it on by hand clockwise until tight. If you feel it needs to be tighter, you can wrap a washcloth around it and tighten it a little more with your adjustable wrench but keep in mind, you don’t want to tighten it too much and damage the mounting bracket threads or shower arm. When screwing on the mounting bracket, you want the open piece on the end of the mounting bracket to be facing up and the middle threaded piece on the mounting bracket to be facing down because that’s where you’ll attach your shower hose.
Step 3: Assemble
After you’ve installed the mounting bracket, you’ll attach the shower head hose. You’ll attach the shower hose by screwing the regular nut-type end of the hose onto the mounting bracket clockwise and tightening it by hand. Then you’ll attach your new handheld shower head to the cone-shaped end of the shower hose by screwing it on clockwise until tight. The cone-shaped end of the hose that’s now screwed onto your new handheld shower head handle will slide perfectly into the mounting bracket so you can return your handheld shower head to it’s mounting bracket when it’s not in use or when you want to use it as a mounted shower head. Following these simple and easy handheld shower head installation steps will help you to install your new shower head quickly and effortlessly.
Visit our store to purchase your own Aroma Sense shower head.

